How to tackle bathroom renovation: our offer, price, and tips
Among the most requested and common renovations, bathroom remodeling represents the greatest complexity in a home renovation project; obviously due to the impact of plumbing system refurbishment and because it is the room in the house where problems such as leaks, humidity, and mold are most likely to occur.
The stages for a complete (serious) bathroom renovation are several, and we will look at some in detail, as they are important for you to consider as a client. Our estimates, except in special cases, include:
- Removal of the old bathroom suite and authorised disposal
- Demolition of tiles and plaster and authorised disposal
- Demolition of floor and screed and authorised disposal
- Installation of a new toilet cistern (see below for specific cases)
- Plumbing installation
- Bathroom electrical system
- New screed
- Replastering
- Laying of new flooring and wall tiles (selected by you and not included in the price)
- White wall painting
- Installation of sanitary ware fittings, shower/bath and taps (selected by you and not included in the price)
So much work? Well, yes... for this reason, when bathroom refurbishment involves replacing the screed, pipes, and systems, it constitutes an instance of extraordinary maintenance and thus requires the CILA (a certified planning permission), which must be submitted to the local planning authority (SUE in Italy).
It also qualifies for the works that can still take advantage of the 50% tax deduction, valid until 31 December 2024 . From 2025, the deduction will reduce to 36%.
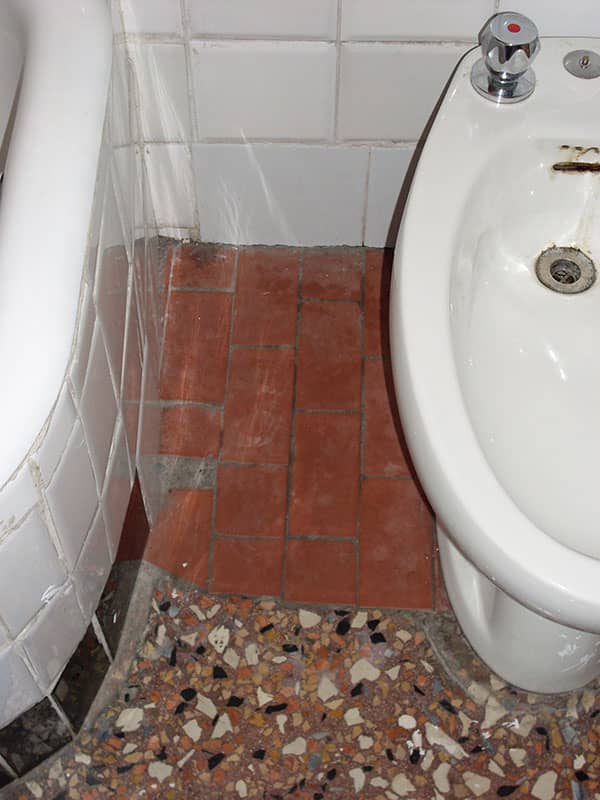
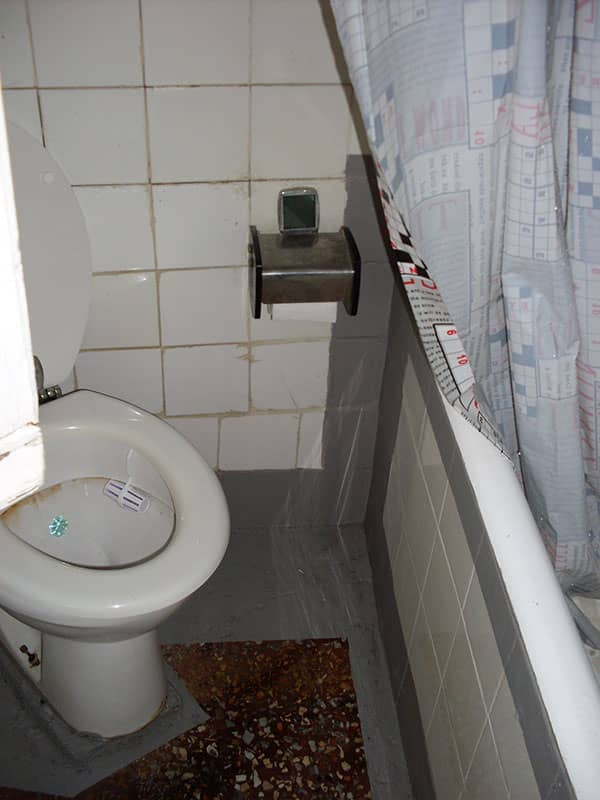
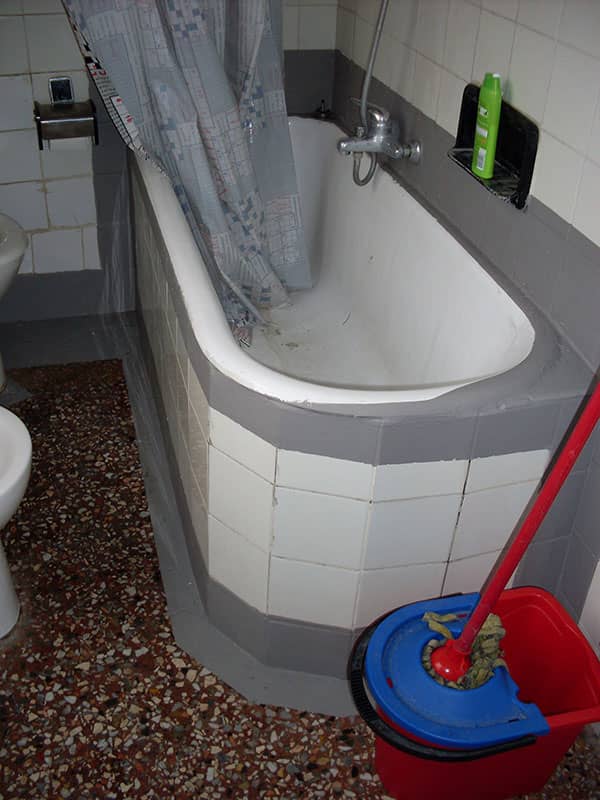
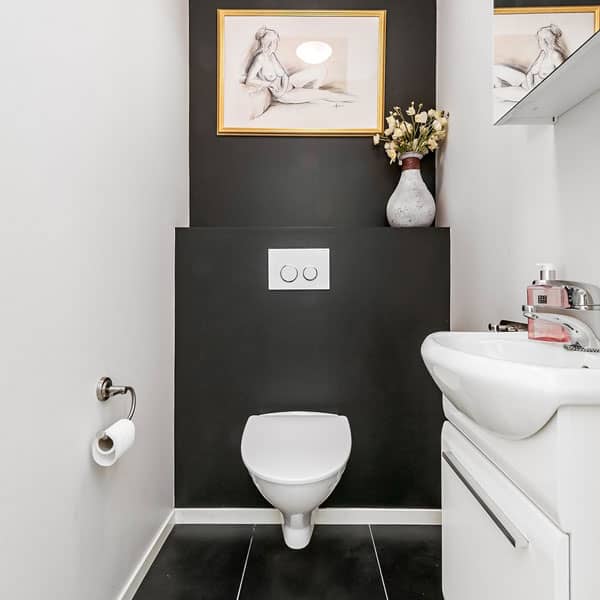
We therefore deliberately include these striking images, so that you might ask yourselves whether it's worth continuing to suffer. :-)
Bathroom renovation starting from 8500 € + VAT (for Bologna and its province)
Include: disposal of materials at an authorized landfill, water connections and compliance certificate. Courtesy and reliability.
Does not include: finishing materials, sanitary ware, taps and permitting applications (CILA/SCIA), nor engineering miracles.
Things to know when renovating your bathroom
We want to give you an overview of the most common stumbling blocks that arise when tackling a bathroom renovation—issues that you might not expect or have thought about when you were imagining your ideal bathroom.
The screed
Here it is, the first culprit on the list: if we're talking about an older property, the thickness of the screed where the new pipes and the drain for the shower tray or bathtub need to be laid, might not be sufficient. Consider that today these elements can take up to 15 cm of thickness. There are reduced-height drains available, but they are more prone to clogs: when the drainage slows down, it needs to be cleaned.
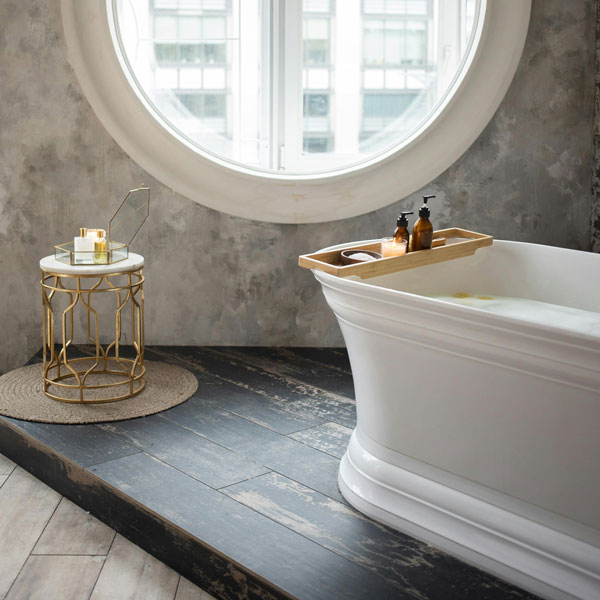
Every cloud has a silver lining! Do you have in mind those ultra-modern bathrooms with two levels? Well, that probably falls into this category, with just a few centimeters of screed; but as you can see, a problem can also be turned into a feature for an interesting aesthetic effect, which definitely adds dynamism to the bathroom.
Usually, if possible, we keep the sink area at its original level and create a raised area for the toilet, bidet, and shower or bathtub
The thickness of the wall
Yes, we know you’re already dreaming of getting rid of that visible toilet cistern you can’t stand anymore... but if it’s still exposed, there might be a reason for it. The flush water tank is the thickest element among those installed within bathroom walls. Today, market solutions are extremely compact, requiring only an 8 cm depth for installation, which becomes 10 cm once plaster and tiles are added. We typically recommend building a slightly higher false wall than the cistern, which also adds a certain style to the bathroom by creating a useful ledge, always handy in any bathroom!
In older properties, bathroom walls are typically made with 8 cm bricks.So, before you assume you can embed the cistern in the existing wall without ending up with the cistern sticking out on the adjacent wall (especially if it's not your wall!), check the usable thickness of the wall before you start designing (and buying).
Without having to build an entire false wall, you can create one just behind the toilet (or behind both the toilet and bidet) using plasterboard, or even better, brick, where the cistern can be housed. Alternatively, you could opt for designer monoblock cisterns, which essentially mimic a similar architectural element—a tall, narrow parallelepiped, often available in various finishes, blending seamlessly with the new style of your bathroom.
The layout of the bathroom and the arrangement of the sanitaryware
If you live in an apartment, there's only one shape for the bathroom: LONG and NARROW! Therefore, the options for altering the current layout of the fixtures are limited: the toilet can be moved slightly, while the sink, shower, and bidet generally don’t pose problems unless the subfloor is too low to achieve the correct slopes. If the drainage of your current bathroom wasn’t designed by a sadist, the toilet shouldn’t be near the door, as it’s not exactly the nicest thing to see first. For obvious reasons, the toilet should be - whenever possible - as close as possible to the window, if there is one, and at least near the main drainage stack.
So, upon entering the bathroom, the first thing you should see is the sink area. If this isn't possible, rather than having the toilet and bidet closest to the door, consider whether it’s feasible to place the bathtub or shower enclosure as the element nearest to the bathroom door.
The bidet should always be placed close to the toilet; we advise against creative placements: if it can't be beside it, then it should be opposite. The ideal position for the shower (or bathtub) is opposite the toilet and bidet... but often, in a long and narrow bathroom, it's too narrow. To make the most of the space in such cases, the best solution is to use the back wall to install a shower enclosure that spans the width of the bathroom (this can also be visually appealing even if there is a window on this wall). So, in order, we would have the sink, bidet, toilet, and shower..
The alternative, if you can only use one wall, is to place the shower enclosure between the sink and the toilet-bidet, but carefully assess the usable space in front of the shower entrance to ensure you can move and turn around comfortably. If, however, you have a square-shaped bathroom, it's definitely preferable to distribute the fixtures across two walls, following the rule of having the toilet and bidet either side by side or opposite each other (for example, the toilet next to the shower on one side and the bidet next to the sink on the other side).
The minimum spaces to consider are: in front of each fixture, you should have at least 60 cm, unless you're inclined to take up contortionism. If it's 70 cm, even better, you won't have to worry if you gain a few pounds. The toilet, however approached, doesn't require much space at the sides; whereas for the bidet, allow at least 18 cm of space on both sides. As for the shower or bathtub, there are countless sizes available, but we recommend, for minimal comfort in the shower, not to go below 70 cm on the shorter side.
These are, of course, general considerations; the possible variables are countless, and ultimately, the layout is always determined by the position of the drains
Getting ready for bathroom renovation: communicating with the building contractor
We've put together this brief list of useful information for you to provide to the contractor, to help establish a constructive dialogue. This allows you to have a draft project plan to follow the work and ensure that it progresses according to your expectations. For the craftsman, who isn't just renovating your bathroom, this greatly eases the management and organization of the job. Providing, if not all, then at least a good portion of the necessary information in a single email or document will make the craftsman happy, and you'll quickly find yourself on their list of favorite clients.
Dimensions and layout of the bathroom
- Measurements: provide a drawing or a sketch with the precise dimensions of the bathroom, including ceiling height and wall sizes.
- Existing structure: indicate the location of existing elements such as doors, windows, plumbing, and electrical systems.
Structural changes
- Removals and additions: specify if you plan to remove or add walls, change the positions of doors or windows, or make significant changes to the layout.
- Sanitaryware and taps: provide details about the sanitary fixtures (toilet, bidet, sink, shower, bathtub) and taps, specifying models, style and finishes.
Lighting and ventilation
- Lighting points: indicate the desired locations for lighting points, the type of preferred lighting (LED, spotlights, pendant lamps), and any special requirements for mirror lighting or shower area illumination
- Ventilation systems: if a bathroom lacks windows or if additional ventilation is desired, specify whether it vents directly outside or into a duct.
Furniture and accessories
- Furniture : describe the type of bathroom furniture, mirrors and shelving you want to use, including style and dimensions (even if it's a later step, it can be useful for space evaluation and to better understand the style and final result you desire).
- Accessories: provide information on any fixed accessories, such as towel racks, hooks, or shelves
Style and design preferences
- Style and colors: let us know your preferences in terms of style (modern, classic, industrial, etc.) and color scheme.
- Inspirations: if there are images of designs that you liked and that represent your vision for the bathroom, save them and share them with us.
Budget and timeline
- Available budget: it's crucial to communicate the budget available for the renovation, to realistically tailor the project to your financial capabilities.
- Deadlines: let us know immediately if there are any specific deadlines by which the work must be completed.
The proposal will depend on a site visit to assess the practicality and feasibility of the desired changes..